My Hair Can't Seem To Get Enough Protein!

Are you one of those people who started using protein treatments (for example, the gelatine treatment from this blog) and find that, at some times of year, the effects wear off quickly. But you don't want to do the whole treatment over  - especially if you're one of those people who leaves it on for an entire hour!

Here's a way to get a respectable dose of protein with relatively litte effort. Keep that low-frizz wave and curl definition going strong.

Do-It-Yourself Protein Additive for Conditioner©Science-y Hair Blog 2013
Mix up this gelatine base (instructions below):
1 packet Knox Unflavored gelatine (or any unflavored gelatin 0.25 oz, 7.25 g or 2 1/2 teaspoons)
1/2 cup distilled water
©Science-y Hair Blog 2013
Mix the gelatine and water (room temperature water) and then pop it in the microwave for about 30 seconds - or heat the water to boiling and then add it to the gelatine. Cool until cool enough to touch.

Now - refrigerate this mixture. This is 6% protein.
To use the gelatine - scoop out an equal amount of gelatine mixture as you will use conditioner. If you use 2 teaspoons conditioner (please measure your conditioner to be certain), then use 2 teaspoons of gelatine. Soften the gelatine by heating it slightly (until it liquefies) and mix with the conditioner.

Now you have a 3% protein conditioner. Apply it to your hair as you usually apply conditioner. Leave it on for at least a minute or two before rinsing.

If this is too much protein for your hair (your hair becomes too stiff or overly soft after using it), try using 2 parts conditioner for each 1 part gelatine mixture. For example, 2 teaspoons conditioner and 1 teaspoon gelatine mixture.

I suppose you could add 1/2 cup conditioner to the gelatine after it has cooled a bit, but before it sets, but be careful when you heat the product so it doesn't separate.
©Science-y Hair Blog 2013
More Protein, More!
If you like this, but want it to be stronger in the protein department, then make the gelatine base with only 1/4 cup water and proceed - your conditioner will now be a whopping 6% protein.

Good luck!

If your hair begins to be too soft, too stiff or limp then knock it off and go back to whatever you were doing.

Related Posts:

What's Cookin' - Easy, Humectant Wave/Curl Boosting Jelly

For this recipe, I was trying to keep what I like about Garnier Fructis Pure Clean Gel and leave what I don't like about it (the scent, too much glycerin and sorbitol, the silicate clay ingredient that is tricky to use).©Science-y Hair Blog 2013
A quick scan of the ingredients and I ruled out the things I didn't want to bother with and that aren't easy to get and formulate with. You can find all these ingredients at drugstores or grocery stores. This recipe is extremely simple, and very good for helping your hair form nice chunky waves and curls - it made mine less frizzy than usual. It has medium hold on its own. If you want more hold, layer some strong-hold gel over it.
©Science-y Hair Blog 2013
The ingredients:
Water: Solvent, dliutent
Xanthan gum: Creates a thick "gel," provides medium hold with humidity-resistance, may slow water loss.
Glycerin(e): Humectant, binds water, boosts curls (for some folks).
Acacia gum: Optional. Adds a bit of "crunch" for more hold. This is sold as a dietary soluble fiber supplement.

I use a double boiler (see my beat-up double boiler at right - it's a metal bowl set in a saucepan with water in the pan almost up to the level of the base of the bowl).
©Science-y Hair Blog 2013
The recipe:
  • 1 cup water (plus an extra tablespoon or 2 which will evaporate as you heat).
  • 1 1/4 heaping teaspoons xanthan gum (2% or 5g)
  • 1/2 teaspoon glycerin - make this a scant half-teaspoon; more than 1/4 teaspoon, less than 1/2 teaspoon (1% or 2.5 g)
  • a pinch (1/16 teaspoon) acacia gum (gum arabic) - optional but good. You can use more - up to 1/2 teaspoon, for example, but you'll need to add conditioner or oil to balance out that stiffness.

Put all ingredients in the double boiler over medium to high heat. When water boils, turn it down. Whisk the ingredients well. The mixture will thicken within a few minutes. Whisk until no more xanthan gum powder is visible. Remove from heat and cool.

Pour into a sterilized bottle and refrigerate immediately - or add preservative according to manufacturer specifications. THAT'S IT! SO EASY.
©Science-y Hair Blog 2013
What else can I add?

  • Magnesium sulfate (1/2 teaspoon) - this is also a humectant and curl enhancer but it can be drying to hair and cause friction.
  • Oil - avocado, grapeseed, coconut, shea butter, sweet almond, jojoba...
  • Gelatine or hydrolyzed protein such as Colorful Neutral Protein Filler (1/4 to 1/2 teaspoon)
  • Aloe. Replace up to half of the water with aloe vera juice - the edible/drinkable kind, not a pre-thickened gel.


What else can I do with this gel? Make a mild shampoo!
Mix a tablespoon or 2 of this gel with a half-teaspoon of shampoo for a milder shampoo which spreads easily in the hair. Get really fancy and add extra oils, protein, clay, herbal extracts, honey, aloe vera juice or whatever you like for a mild, detangling shampoo with lots of hair benefits.


Related Posts:

Gelatin Hair Protein Treatment FAQs

Here are some tips and tidbits about my gelatin protein treatment recipe:
©Science-y Hair Blog 2013
Concentration
If you use a whole packet of Knox gelatine (2 1/2 teaspoons, 0.25 ounces or 7.2 grams) in 1/4 cup (60 ml) water that is 12% protein. Which is a lot. And this is only if your finished product is 1/4 cup, including anything else you add.
2 1/2 teaspoons gelatine in 1/3 cup water is 9% protein.
1 1/4 teaspoons gelatine (half a packet of Knox) in 1/4 cup water is 6% protein
2 1/2 teaspoons gelatine in 1/2 cup water is also 6% protein.

Protein additives for hair products are usually recommended at a use rate of 2-5%. If the protein in your conditioner is listed before the preservatives, it is probably around 1-2%. If it is listed after the preservatives, it is probably at a concentration of 1% or less. Bear in mind that not all proteins behave the same in all hair types. Different proteins work better with different hair.
©Science-y Hair Blog 2013
How long do I leave it on? Leave it on your hair for about 3 minutes. Some people leave it on longer - but don't do that on your first try. There is a point at which your hair has "soaked up" or bonded with all the protein it can and beyond that, no more time will be of benefit.

Should I use heat? That's up to you. I get enough heat from wrapping my hair in plastic and letting the shower run over it a little while (not long). Heat is not absolutely necessary. But some people have better results using heat, whether by wrapping a warm, wet towel around the head, using a blow-dryer, or whatever else you can imagine. Heat speeds up reactions and helps the gelatine spread around to cover every hair (assuming you've covered your hair). I've done this treatment with no wrapping and no heat and got good results. It depends on how much bother you want!
©Science-y Hair Blog 2013
Gelatin made my hair too stiff (or too soft).
  1. Did you rinse very thoroughly? One must rinse out a gelatine protein treatment very well.
  2. Did you use too much gelatine? Some people only need 1 teaspoon, or even 1/4 to 1/2 teaspoon per 1/4 cup liquid (or however much you use).
  3. If your hair is stiff only sometimes - leave out any vinegar or citric acid. Leave the treatment on for less time.
  4. Is it too soon to do a protein treatment? Some people can use strong protein treatments regularly, but not everybody. If too-frequent treatments make your hair stiff or too soft, your hair is telling you it's too much!
  5. Does your hair always respond badly to protein? Then don't use it!
  6. If your hair gets stiff and tangly, try mixing oil and conditioner into the treatment, or using a rich (deep) conditioner afterwards, or just a little extra conditioner.
Should I wash my hair first?©Science-y Hair Blog 2013
This is up to you. I use it on freshly-shampooed hair or "second-day" hair which has been rinsed with water. Some people use this treatment on hair which has been washed with conditioner. There are no rules.
©Science-y Hair Blog 2013
Will this treatment work for me?
Only one way to find out! As a rule of thumb, fine hair, porous hair, bleached hair, damaged hair (from heat, sunlight, brushing, chlorine) can benefit from protein. Kinky hair can too - and that includes gray hair with a kinking habit. If your hair needs more support or structure ("stiffness"), protein may work for you. If your hair snaps at the slightest tug, protein may help.©Science-y Hair Blog 2013

On the other hand, if your hair strands are coarse (wide, strong, easily visible) and it has plenty of internal suport and stiffness on its own, adding more stiffness with protein may be a hair disaster; though a very low concentration of protein may be beneficial if your hair is also porous and damaged.

If you're not sure: Try a very dilute protein treatment (use 1/4 teaspoon gelatine in 1/2 cup liquid). Or try whatever strength gelatine treatment you wish on a small section of hair first.

Related Posts:

Update to the Gelatin Protein Treatment

I decided that I wanted to be able to make my gelatin protein treatment for hair in less than a minute (and not wait for it to cool) because I'm always rushing to get in the shower. Impatience can be a virtue if it means you come up with a faster way to mix up a PT! You need a microwave oven for this.

Here's what you do:

Mix gelatin and about 3/4 of the cold water you plan to use in a microwave-safe cup. Let it sit for about 30 seconds. Then microwave for 20-40 seconds. Long enough to dissolve the gelatin so there are no tiny gelatin grains (or flakes) visible. Add the remainder of the water to help cool down the mixture before adding other ingredients and applying.
Recipe is in the link below.
-------------------------------------------
This protein treatment recipe is STRONG! Not for the faint of heart nor for the hair protein-treatment-newbie. If you're not yet sure about how your hair reacts to protein - use a much smaller amount of gelatin than stated. This recipe does not provide "slip" or detangling so use conditioner or oil in your recipe if you find you cannot get it through your hair or it creates tangles.

Related Posts:

What's Cookin': Flax-Free Hair Gel

This recipe is a curl-enhancing, super-thick gel which doesn't require straining like flaxseed gel does. It encourages waves and curls and adds volume, but leaves hair very soft and has medium hold. Xanthan gum and Guar gum can be found in the gluten-free baking section of large grocery stores, or in natural food stores (or online). Sometimes natural food stores have bulk spices and you can buy these products in small amounts. This is a good product alone for soft hair, or can be used under a strong-hold gel as a curl enhancer, or mixed with it for more hold. It's very much like my flaxseed gel recipe #1 (mid-page) - but without the flaxseeds.©Science-y Hair Blog 2013

Time to make gel: About 10 minutes. It must cool a little before adding the final ingredient.

Freshly made gel, cooling in the sink.
You need a double boiler for the best result - put a metal or glass bowl into a saucepan with water (water should touch the bottom of the bowl, bowl should not touch the bottom of the pan - it should rest on the rim). This prevents overheating and won't let your gel boil too furiously. If you want to leave out the aloe, just use 1 cup plus 2 tablespoons water.

1/2 cup plus 2 tablespoons distilled water
1/2 cup aloe vera juice
1/2 teaspoon each of Xanthan gum and Guar gum
1/2 teaspoon agave nectar or honey (use 1 teaspoon for more hold) optional, doesn't provide hold in high humidity
6 drops grapeseed oil for fine hair (use coconut or olive for dry hair - more oil can be used, especially if you use a full teaspoon of honey or agave).

Put distilled water, aloe, and xanthan and guar gum in the bowl and whisk to disperse. Place bowl in pan over heat and whisk as the water heats. When water in pan boils, turn it down and keep whisking until the mixture thickens and you don't see little granules on your whisk (or fork) - about 3-5 minutes.

Remove from heat and take bowl out of pan (carefully - escaping steam is hot and will burn your fingers - use oven mitts or pot-holders). Add agave or honey now. It may smell a little odd - but that goes away when it's cool.
©Science-y Hair Blog 2013
After the gel has cooled to "warm," add the oil (if using) and mix well.

Freshly made gel in my hand - it thickens up a little more
when cooled completely.
Cool and refrigerate. This gel is very, very thick. It will keep for about 2 weeks in the refrigerator. If this is more than you'll use in 2 weeks, freeze half or cut the batch in half when you make it.

For a thinner, less goopy gel try one of the following:
1) Use a heaping 1/2 teaspoon xanthan gum only (no guar gum), all the other ingredients as listed
or
2) Use only 1/4 teaspoon of xanthan and guar gum

Apply liberally to wet or damp hair. Scrunch in well (more scrunching molds better curls), squeeze out any excess with a towel or old T-shirt. Also can be diluted with a tiny amount of water and scrunched into dry hair to re-activate waves and curls and add shine and hold.


Related Posts:

Reasons to Make Your Own Hair Gel


I make almost all my own hair products. They are not all made from “natural” or food-type ingredients. That doesn’t bother me, I’m fairly chemical-literate. I also am allergic or sensitive to ingredients in many hair and skin products. So when I feel bad that I cannot try the new, pretty hair product that promises to transform my hair from “Plain Jane” to “Magazine Cover ” or I can no longer buy a product I liked – I remind myself of these things.©Science-y Hair Blog 2013

Homemade
hair gel
Reasons to make your own hair gel:

·      You control the ingredients. Leave out the itchy or smelly ingredients, or the   ones that cause build-up. It’s tailored for your hair and scalp.
·      You control the “hold” so you can have the same gel with medium, light, or strong hold, depending on your mood or the style you have in mind.
·      You can adapt the product to your needs for the season or occasion – more emollients? More humectants? Need protein? Just add some. Done!
·      No worries about your favorite product being discontinued or changed = lower anxiety level (okay, I’m kidding a little – but it really stinks then that happens).
·      You can use as much as you want. Glob on the gel and dab off the excess – when it’s inexpensive and homemade you can be extra-generous with gel.
·      Inexpensive (even if you invest in a bunch of ingredients).
·      Re-use bottles many times before recycling them. 
.      Homemade gels work well layered under or mixed with commercial (store-bought) hair gels. Got a product you like, but it just needs a "little something?" A DIY hair gel could be your solution!
·      It’s fun to try new things with the low investment – and you learn a lot!
·      Fewer worries about developing skin sensitivities, triggering asthma, rashes or migraines. You can be allergic or sensitive to almost any ingredient, but some preservatives and fragrances are more highly allergenic than what you’ll use at home.


Why You Really DO Have Time To Make Your Own Hair Gel
·      You won't waste time reading labels, buying things that smell too strongly or cause itching or don’t work right.
·      It really only takes about 15-20 minutes to make hair gel and clean up, and it’s so easy that you can start it while you’re cooking other things or doing the washing up. One cup of gel will last about 2 1/2 weeks in the refrigerator if you use sterilized containers and keep your fingers out of it (unless you use it up before that).
·      Make a double batch and freeze half. Or a triple batch…
·      Make a batch and split it so you can add different ingredients.
·      Once you learn how to make gel – it goes quickly. 
·      You just need to plan time for it. Consider it “me” time, not a chore. Enjoy yourself.
©Science-y Hair Blog 2013
Actually – that last one relates to cooking food for yourself and your family too. Yes, we’re all busy and cooking food or hair gel takes some time, planning and effort. But the process itself demonstrates the value of family and self and is an expression of caring. When I’m too pressed for time to cook – I know I need to re-evaluate my priorities.©Science-y Hair Blog 2013

A final word - homemade hair gel needs refrigeration or a preservative to keep yourself and anybody else in your home safe. Here are some preservation options for homemade hair gels.


Related Posts:

Hair Porosity: How To Measure (Sort of)

First off -  think of your hair not as a fiber like yarn because hair is more complex. Think of the inside of your hair like string cheese - protein which is flexible and retains water - it will swell when wetted. Then think of the cuticle as though you glued several layers of tiny, overlapping shingles to the outside of the cheese. You've used proteins and amino acids and lipids (fats) to glue all this together. It's flexible - but it's also prone to damage because proteins and fats do break down. Your hair's porosity is probably not the same at the roots as at the ends, the ends are usually more porous.

"Pores" are openings in the cuticle layer(s) - whether they are chipped or torn cuticle scales (imagine torn or ripped-off shingles), or cracked, shrunken and fused, or simply not glued down very well. Any of these situations leads to a less-protected hair cortex - which means your interior of string cheese will dry out more quickly.©Science-y Hair Blog 2013

Why the Float Test Is Inaccurate:©Science-y Hair Blog 2013
The "float test" for hair porosity is one in which you try to float a strand of hair in water. It is supposed that a porous hair will immediately begin to absorb water, become heavy, and sink. But there are some flaws in the design. See this post for an update to the float test.
  •  First of all is surface tension of water. The molecules at the surface of water stick together where air meets water. Like a "skin" on the water. If you place a light-weight object on the surface of the water gently, it will float. You can make sewing thread and even dry sand float on water this way. So let's say you have a very lightweight, but porous hair and you drop it in a glass of water. The surface tension may well override the weight and porosity of the hair strand and it floats - even after many minutes have passed.
  • Second - specific gravity. Hair and water have a similar specific gravity. Things of similar (or lesser) specific gravity to a given liquid will float in that liquid. Dry hair is buoyant in water - like ice or driftwood.
  • Third: What is on the hair? Is the hair heavier due to the weight of a product? Is that product repelling water? Is that product a wetting agent (like hair conditioner) which will cause the hair to become wet more quickly and sink?
Arrows show where the cuticle has chipped away due to sun
and friction.
See what I'm getting at? Too many variables. And for porosity, your own observation is going to take many variables into account which will give you plenty of relevant information.

One of the most accurate ways of measuring hair porosity is using gas sorption to determine total pore volume (holes in the surface) - which is expensive and absolutely not do-it-yourself. It measures how much of a given gas can be taken into hair - hair which has more pores will take on more gases. Hair can also be examined under a microscope to determine how much chipping, wearing away, or lifting there is in the cuticle. This is purely visual. Weight of water taken on by a dehydrated hair sample could be measured, if you had a bunch of other samples to compare to for reference material. All impractical!©Science-y Hair Blog 2013

Most very accurate methods of measuring porosity are not accessible to most people and that's okay because it is really easy to determine. This post has more information about hair porosity, some of which is about to be repeated.

Porosity matters because it determines how much protection your hair needs (what you'll apply to it) and how quickly it will lose water. It also determines how well or quickly your hair takes color. Porous hair loses water more quickly than hair which is not especially porous. Dehydrated hair (like dehydrated string cheese) is less pliable, breaks more easily, has less shine and does not hold a shape (like a curl or wave) neatly.

How to Determine Your Hair's Porosity: This is something you learn from studying your hair by running your fingers over a hair strand, observing shine or reflectivity, how hydrated your hair feels on a daily basis, and your hair's response to products. Learn by studying!? Yes, this is sensory and multi-faceted. You are the best judge of your hair's porosity - here are some hints.©Science-y Hair Blog 2013

This hair is fairly healthy - the cuticles are intact
and fit tightly over one another - not very porous.
Not-porous hair: Your hair is not porous if it is very shiny. Try folding a wide strand of clean hair (no styling products) over a finger - does it shine brightly? If you do not heat-dry your hair with high heat or use curling or straightening irons, do not spend much time in the full sun, do not brush your hair often or do not color or bleach (highlight) it - it's probably not very porous. If your hair does not absorb oils and conditioner and becomes greasy or limp easily, it's probably not very porous. Not-porous hair takes permanent waves (perms) poorly and resists chemical straightening and hair dye. Not-porous hair does not tolerate lots of conditioner or oil - it will become oily-looking and limp (although this variable overlaps with the diameter of your individual hairs quite a lot). Not-porous hair will not dramatically change with more conditioner or deep conditioners because it is not losing a lot of water under most conditions - its cuticle fits snugly and there are not a lot of cracks and chips. Products (hair conditioners, oils, styling products) do not seem to "soak in" to not-porous hair. Not-porous hair is easy to maintain in a healthy condition. There is no reason to try to make it act more porous so that you can apply products to make it softer. Hair products like conditioner are actually designed to make hair behave as though it is not-porous. So if this describes your hair - life is good!©Science-y Hair Blog 2013

This hair is showing normal porosity - the cuticle looks
like shingles on a house - you can see this at the edge of the 
hair.
Normal-porous hair: It shines, maybe not quite as much as not-porous hair. It perms and takes color as expected. Your hair can be normal-porous even if you use some heat on your hair (low-heat diffusers). Normal-porous hair does not become oily-looking with reasonable amounts of conditioners or oils. Normal-porous hair may have times when it feels a bit dry, or not dry at all and it is easy to make it feel "not dry" and soft with hair conditioner and gentle care. You perceive some "soaking in" of hair products. You probably have had some exposure to the full sun, possibly chlorinated swimming pools. Your hair may be not-porous near the roots and normal-porous further down and therefore respond differently to conditioners in those two areas, which is why many people condition their hair from the ears, down. If you run your fingers up and down an individual hair, it feels mostly smooth. This normal-porous hair has cuticle scales which look like shingles on a roof. They overlap and don't stick up much.©Science-y Hair Blog 2013

A kink in a hair where it is both narrowing and twisting.
Porous hair: If you run your fingers up and down a hair strand, it may feel bumpy and uneven due to kinking, or to damage. Quite porous hair does not shine much and though it may have some gloss, it's not "reflective" or brightly shiny. It will seem to absorb hair products of any kind, tends to feel dry most of the time and you have a difficult time getting it to feel soft and pliable. It may lose dyed hair color rapidly because of the porosity.

  • Kinking and porosity: Kinking in hair creates an uneven surface and it may be difficult for cuticles to lie flat and smooth when the hair shaft they're attached to is widening and narrowing or torque-ing (twisting). Any uneven surface accumulates more friction than a smooth surface. If a cuticle sticks out a bit, it is likely to be chipped or broken off. Kinking hair can be more vulnerable to increased porosity when exposed to daily wear and tear because it suffers more friction from everyday living than non-kinking hair. This photo (above, right) shows a porous hair with kinking (a kinky, curly hair). Kinking can occur in any hair - straight, wavy, or curly. Not every person with kinking hair will have porous hair - and you can look at people in your family to see whether you inherited hair that tends to be extra-thirsty or not. There are many variables involved, but this is an important one to know about because people with kinking hair usually need plenty of "slip" in conditioners to reduce friction. I'm fascinated by the patterns and frequencies of kinking in hair, so I digress...

Arrows show "lifted" cuticle which is one type of pore,
making this hair moderately porous. This is a little tricky to 
photograph. Lower down there is an indentation which
is where a piece of cuticle has broken off.
  • Environmentally porous hair (damaged hair): Hair becomes porous with high-heat styling tools (curling/straightening irons, hot rollers, blow dryers on high heat without diffusers). Hair becomes porous with a lot of sun exposure or a lot of swimming in chlorinated water or salt water. Bleaching or highlighting immediately make hair more porous - up to 30% more pores than prior to bleaching - this is similar to the increase in porosity from 200+ hours of direct sunlight exposure. Brushing hair a lot, shampooing frequently, regularly wearing barrettes or tight clips, ponytail holders all can shear away pieces of cuticle or entire scales, leaving gaps. Friction of a handbag over hair, hair tucked into a collar, under a hat and so on also shear off cuticles. 
This hair has substantial sunlight, chlorine and friction 
damage. Notice you can barely see any cuticles. This
is not bad focus in the photograph, it is hair damage. This hair
is quite porous.


Porous hair usually takes on dye, permanent waves and chemical straightening quickly. And loses dye quickly. Porous hair loses moisture easily. The hair in this photo is porous because of all the sunlight and brushing and chlorine it was exposed to over many years. In this case, most of the cuticle has been sheared off and is not visible. It has a difficult time retaining moisture.©Science-y Hair Blog 2013


References:
Hessefort, YZ, Holland BT, Cloud RW, 2007. True Porosity Measurement of Hair: A New Way to Study Hair Damage Mechanisms. Journal of Cosmetic Science

Chemical and Physical Behavior of Human Hair 
Robbins, 1994. 3rd Ed. Springer-Verlag, New York

Related Posts:

Is Your Hair Fine, Medium, or Coarse? How to Measure


Is your hair fine, medium, or coarse? It's not always easy to tell. Healthy hair and dry, environmentally-stressed hair may feel and look very different. You may think your hair is coarse (wide) when it really has some fiber twists and bends (kinking) or is "medium." Dry hair is often described as "coarse" feeling because it feels rough.©Science-y Hair Blog 2013

Measuring is the best way to find out what the dimension of anything actually is. Hair is measured in microns. There are 1000 microns in one millimeter. ©Science-y Hair Blog 2013

Hair Diameter Categories:©Science-y Hair Blog 2013
Fine hair: Less than 60 microns (16 or more hairs per millimeter)
Medium hair: 60-80 microns (12 to 16 hairs per millimeter)
Coarse or wide hair: 80 microns or greater (fewer than 12 hairs per millimeter)

To do this test, you need about 20 hairs which you have shed, and a metric ruler. 

How to choose your sample:
We're assuming that hairs you've shed while washing or on your clothes are a "random sample" meaning they are hairs from all over your head and therefore there is a good chance that these represent your hair in general. If you take hairs from only one part of your head, you may get a inaccurate result. For example, the hair on the top of my head tends to be finer (40-60 microns) than the hair near the nape of my neck (60-80 microns). I want both in my hair sample. Unless I want to measure them separately! If you want to measure different areas separately, collect hairs from those areas and keep them in a bag or jar with a label until you have enough to use.

Method:
1) Dip the hairs in clean water to rinse them and make them pliable. No knots! Cut them to a manageable length if they are quite long.
2) Line up 10 of the hairs in a drop of water or a drop of hair gel (the water will help them stay in place and prevent them from bending or curling). Pack them as closely as possible without overlapping - use a straight pin or toothpick to press them together. Make sure you count how many hairs you are using. You're going to pack them more tightly than you probably think is correct. Just don't let them overlap. If you do not press them very tightly together, you'll get an estimate which is too large. You'll create a very solid little sheath of hair. There should be no gaps or air spaces. If your hairs are very curly, weight them at each end and gently pull them straight. If you have tightly-curled hair with many kinks, apply coconut oil or another oil to the hairs to make them pliable.
3) Place the ruler gently over the swath of hairs and see how many are fitting into a millimeter. Put the ruler down on the hairs, don't hold it above them. If you can add more, add them, make sure you keep track of how many you added.©Science-y Hair Blog 2013

Then refer back to the list. 
  • 15-16 hairs or more pack into a millimeter: Your hair is fine.
  • 10-12 pack into a millimeter and you are pressing them tightly: Your hair is medium.
  • 10 hairs pack together within a millimeter: Your hair is either medium and has kinks that prevent close packing, or it is coarse.
-----------------------------------------------------------
  • Fine hair is silky when healthy. It bends easily, it is dented easily by ponytail holders and hair pins. It is easily flattened by weight of water, oils and conditioners or or other hairs. Think of milkweed down or little-kid hair. 
  • Medium hair has a little more structure. It resists bending a little more than fine hair. Medium hairs are easier to see individually and feel between the fingers. 
  • Coarse hair resists bending. It feels strong between the fingers and is quite visible, even against a similar-colored background.

This picture if of fine hair. I packed 15-16 hairs into one millimeter. You can see it wet, but there's a photograph of the hair dry too because it photographed better. I know these hairs are about 60 microns in diameter, so I kept packing even when it seemed that 12 was enough.
Hairs laid out in water - the space between the
smaller marks is one millimeter.

Oops. I made a gap when I put the ruler down.
This will give me an inaccurate result. But the
photo is in better focus.

Same hairs, photographed dry. They spread out a bit
when I put the ruler down - that's why
I suggest using water to hold them in place.


These are the same hairs, all spread out. It's hard to tell from
looking at them like this that so many will pack into
one millimeter.
A word about kinks in hair. Anybody can have kinking in their hair strands. This may be subtle widening and narrowing of the hair shaft. It may be a subtle twist in a similar motion to wringing the water out of a wet cloth. Or it may be lots of tiny bends. You may feel these when you run your fingers over a strand of hair as bumps or roughness, but you may or may not be able to see them. 


Is this method completely accurate? If you pack those little hairs in tightly and also take into consideration the way your hair behaves as well - it should give you a good estimate. You can always have hair which is in-between. Measurements are only as good as the technique of the person doing the measuring. If you feel you got the wrong result, try it again, try it with the hairs dry instead of wet, use a hand lens (magnifying glass) to see your work.

The trickiest part of this method is to get the hairs to stay in place.

Why do I suggest this tricky method? This is a Science-based blog. In science, measurement is critical. You can't really have facts without measurement of some sort. And when we measure, we must absolutely have accurate references because all measurements are relative. For example weight is relative to a standard pound or kilogram. I call this the "sanctity of reference materials." If your reference materials are not chosen with accuracy and effort, all your facts and conclusions will be wrong. If I tell you that a toothbrush bristle is "x" number of microns and a silk or wool or cotton thread is "x" number of microns, so just compare your hair to these things - which toothbrush, thread and so on am I referring to? Is there a global standard? No. All there is, is extreme variability. Measuring is at the heart of science. And it is not always easy.©Science-y Hair Blog 2013

Related Posts:

Wonky Weather - Graphs!


A very science-y post. Fun!©Science-y Hair Blog 2013
Dewpoint and relative humidity and how they effect hair has been swirling around my mind this spring as we have had some really variable weather. I live where winters are usually cold and dry, summer is usually hot and humid and spring and fall are combinations of everything. Dewpoint and relative humidity are not easy to understand. They're in the realm of physics - things like “saturation air pressure” that we experience every day and know what they are from experience. But when we try to measure them and predict and explain their effects on other complex systems like hair – Man! It’s not easy.

Here’s what is wonky: Dewpoints getting into the “moderate” range, but dry air. You think your hair should be bouncy and defined, but instead it wants to be limp. But the dewpoint is above 40°F, you think – so what gives? When you go outside, your lips and eyes and mouth dry out and your waves and curls lose their spring or feel rough.

In transitional seasons – it helps to pay attention to relative humidity. For example, the dewpoint is 44°F and the temperature is 80°F. Relative humidity? 28% That’s dry. At this temperature, a cubic meter of air can accommodate up to 30 grams of water (about 1/8thcup).  But it’s not. It’s got about 28% of that.  If it cools down to the dewpoint (or pretty close), we’ll have dew on the grass and a higher relative humidity, but given the moderate dewpoint, it’s still not super-duper juicy air.©Science-y Hair Blog 2013

When the air is super-juicy, I don’t need a weather forecast to tell me that. When I take the dog out in the morning, my hair immediately feels heavier and bouncier as it begins soaking up moisture. That and my shoes are soaking wet.
I’m going to share my love of graphs for some more dewpoint and relative humidity visual aids. Graphs are worth many thousands of words.

Graph #1: Hydration Levels of Hair

This graph is the amount of water which can be absorbed by hair at various relative humidities (RH).  On the left (upright axis) is the RH and along the bottom the numbers indicate the percent of water your hair can hold at these amounts of 
relative humidity. This only goes gown to 40% relative humidity.  You know it gets drier than that!
My point here is to show you how much LESS water there is in your hair at low RH, or how much more moisturized your
hair is at higher RH values.

Graph #2: Water in air at various temperatures

This graph shows the maximum amount of water in grams per kilogram of air, that air can hold at various temperatures
(when it is saturated with water). Please note the temperatures are in °F. 
Grams of water is on the upright axis and temperature in degrees F is on the horizontal axis. The goal of this graph is to 
show you the huge variation in how much water can be in the air at different temperatures. It's not always as wet as it can 
be! One gram of water is just under one quarter (1/4) teaspoon.  This is the basis of dewpoint. Dewpoint is a set point whereas relative humidity is a moving target. But relative humidity is always relative to whatever the dewpoint is in your region.

Graph #3: What happens indoors

Let's say you are indoors at about 68°F (20°C). You look at a hygrometeror or humidity meter and it shows the indoor
relative humidity is 50%. Find 50% on the bottom (horizontal) axis of the graph, follow it up and you see that it
corresponds to an "indoor dewpoint" of just over 50°F. An indoor relative humidity of 30%, if the indoor temperature
stays the same corresponds to an "indoor dewpoint" of about 35°F. When the temperature stays the same, dewpoint and
RH give you similar information.

Graph #4: Dewpoint vs. Relative Humidity

For units, refer to Graph #2
Blue Bar: How many grams water a kilogram of air can possibly hold at the temps (in °F) shown along the bottom of the graph. But in reality, the air isn't always full of water and the temperature and relative humidity are frequently changing in relation to each other.
Red bar: How much water is in the air when the relative humidity (RH) is 25%.
Green bar: How much water is in the air when the RH is 50%.

So even if your dewpoint is up there at 60°F, when the RH is down around 25% - it feels dry.

Glad you stuck with me! I hope that gave some images to your experiences. Or drove you crazy, but in a good way. Skin and hair are not losing moisture to the air around them when the ambient relative humidity is around 60% or above. I have seen two sources for this figure, but I don't think they considered that it can be 60% relative humidity when it's 20°F outside.

So above 60%-70% RH, hair can begin to frizz because it's taking on moisture. As it does that, it A) better expresses its wave/curl pattern and B) said wave/curl pattern wants to take up more space because the fibers don't align neatly. Shorter hairs reach for the sky! If your waves or curls are not very springy or your hair is very fine, when the dewpoint and RH are both very high, your hair may get limp as the weight of the moisture overwhelms the fibers.

Here is another post about humidity.
And here.

Any physics or climatology teacher (or climatologist) would and should feel faint when they see how I have boiled this down because I'm leaving out some technical points. But hey - science belongs to all of us. And we're talking about how the humidity as "juicy or dry air" effects hair - a proteinaceous fiber system. So we need to cut out some of the details because what we really want to do is be able to apply this information to our daily lives. 

Related Posts:

I Post Stuff on Facebook Too

In the lower right side of this blog page, there is a Facebook "badge." If you click on it, it takes you to my Facebook page. I am going to be posting links to articles and other little things which might be of interest there.

Related Posts:

Summer Sun and Your Hair

I'm sort of recycling part of a previous post. Recycling is good though, right? ©Science-y Hair Blog 2013
Full sunlight on your hair can be bad news if you get too much.
  • When hair is exposed to 200 hours of ultraviolet radiation from sunlight, the cuticle edges begin to fuse and as a result the total cuticle surface “shrinks.” As it shrinks, tiny openings are created where cuticle once was and these are known as "porosities." It's like putting a piece of plastic on a hot stove or in the oven - it shrinks as it heats and as it is assaulted by ultraviolet light.
  • After 400 hours of ultraviolet light / sun exposure, porosity continues to increase with further cuticle damage.
  • After 1200 hours, the cuticle becomes rigid, brittle, and may crack under stress, leading to even further increases in porosity. ©Science-y Hair Blog 2013
If your hair grows the "average" of up to 6 inches per year (15 cm) and you get sunlight for even half an hour per day, during half of the days of the year, the ends of your hair most certainly have sun damage unless you wear it very short. 

When hair is more porous, it loses moisture and becomes dehydrated more easily. It is more susceptible to damage. To protect your hair from the sun, wear a hat or use products with "UV protectants." I feel that the "UV protectant" is only half the story. When my hair is baking in the hot sun, it is being dehydrated by the high heat. All those lovely proteins and oils in the top layers of my hair are doing unknown chemical reactions with the heat and UV light. A different effect, but it's one that makes my fine hair feel drier and more fragile in summer than it does in winter when the air is cold and dry.
©Science-y Hair Blog 2013
A healthy (undamaged) or continuous cuticle holds water in, preventing dehydration. A sun-damaged cuticle has a harder time doing this. To manage sun-damaged hair, use protein-enriched or humectant-enriched conditioners or protein treatments to temporarily patch up the gaps in the cuticle. Leave-in conditioners or small amounts of oil used on damp hair to seal in moisture, slow dehydration of the hair and keep it supple. A porous cuticle patched and lightly coated with conditioners, proteins or oils also holds moisture within the hair longer. 
©Science-y Hair Blog 2013
Don't forget - if you're going out without a hat, a little sunscreen on your scalp near the part in your hair will save you from a part-burn that hurts for days and can lead to skin cancer down the road. 


Source: Chemical and Physical Behavior of Human Hair 
Robbins, 1994. 3rd Ed. Springer-Verlag, New York

Related Posts:

Makeup - Rationale and Yikes (!) Sensitive skin.

I can do this the most justice by linking you to this article from PLOS. You absolutely must scroll down to where you can click on the photographs they have of the same women in different amounts of makeup and learn (much to your chagrin) that you, too are probably influenced by a petty bias! I was very annoyed with myself to find that I was. An amount of makeup beyond "covering up zits and using lip gloss" but less than "darkened night-club, sexpot glam" makes women appear more likable, successful, trustworthy and competent. Obviously this is a cultural bias. But it's our culture (I'm talking about North America), so its kind of hard to escape, like it or not.©Science-y Hair Blog 2013

Here's my experience with makeup.
1) Apply eyeshadow for an evening "out."
2) Weep my way through the evening, make determined effort not to claw at itchy, swollen eyelids.
3) Swear I'll never do that again.

Or this:
1) Find a foundation I like that's light, unscented and not itchy or thick.
2) Keep it for 3 years because I don't use it very often. (Yeah, 3 years is too long).
3) Next time I need foundation - it's been discontinued and the new one is like poster paint or full of itchy ingredients.

Rats. A little makeup helps people take us more seriously (in context, anyhow), but it drives people like me to distraction. So what is it about makeup that gives it such power? It turns out, the answer is really simple. Contrast. Darkening of the eyes and lips. Smoothing and evening the skin tone, no matter how dark or light your skin, provides better contrast for a bigger difference between eyes, lips and face. How you use makeup is not as important as that you increase the contrast.

Contrast of facial features is a feminine characteristic. More contrast looks more female. Less contrast looks less female. And looking more female and more "beautiful" (meaning more contrast, more even-ness) gives you an advantage.

So what to do if your skin goes on strike when you wear makeup?

1) Even out skin tone.
  • Find a lightweight, fragrance-free foundation to conceal red areas (scars, zits, that area around the nose or under the eyes).
  • Cover acne or raised areas with a darker foundation.
  • Use powder if you hate liquid makeup, just make sure you use face lotion underneath and have it with you for touch-ups.
2) Eyes: Darker... somewhere
  • If you can't use eyeshadow on your eyelids - fill in your eyebrows with an eye pencil or eyeshadow.
  • Use a clean baby toothbrush to put coconut oil, olive oil, hypo-allergenic hair gel (this works really well!) or petroleum jelly on your eyelashes instead of mascara (then wash it when you're done).
  • Use foundation makeup (or powder) on your eyelids to even out the skin color.
  • Sometimes (I make no promises) you can find an eyeliner that doesn't itch. Maybe look for  liquid ones.
3) Lips - choose a lipstick or colored lip balm a shade or 2 darker than your own lips.
4) Especially if you're over 30, blush will give you more contrast on your face.

I can't say much about how to apply any of this because I don't much like applying makeup. These are just my work-arounds.©Science-y Hair Blog 2013
A little 1% hydrocortisone ointment is handy for any time you use a product that your skin reacts badly to.

Related Posts:

What's Cookin' - Anti-Frizz Shine Spray

Light-hold, anti-frizz shine spray.

This is a recipe for an all-natural spray that is great for your hair.
What it does:
Adds shine and softness
Light hold
Reduces frizz
Contains waves and curls (tames flyaways)
Defines waves and curls (doesn't make hair curlier)
Completely natural look and feel (dries with a bit of crunch, but you can smooth it out and even comb gently through it).
Easy to apply


Ideal for:
A "unstyled" look - for soft and natural-looking hair (basically a wash and go) but without frizz and flyaways.
Putting hair up without getting a halo of "fuzz" on humid days
Kid hair
Refreshing hair during the day
Days when you want your hair to be soft and natural (basically a wash and go) but without frizz and flyaways.


Ingredients: ©Science-y Hair Blog 2013
  • Acacia senegal fiber (large pharmacies or natural foods stores or online) This is a great remedy for allergy-induced intestinal upsets, so it's handy to have around for many reasons. Forms the frizz-reducing film and adds shine. Won't thicken - so the spray is liquid and easy to distribute. Alson known as "gum arabic."
  • Aloe vera juice (edible - the kind you must refrigerate)
  • Oil (apricot kernel, grapeseed or canola for fine hair, coconut or olive for dry hair)
  • Agave nectar or honey
Directions: 
©Science-y Hair Blog 2013
Heat 1/4 cup aloe vera juice, 1/4 cup water and 1/4 to 1/2 teaspoon (heaping) acacia fiber in a pan until it boils, stirring with a whisk or fork.

Remove from heat and stir in 1/8 teaspoon agave nectar or honey, and from 2 to 6 drops oil. (More oil if your hair is dry, or if the air is very dry)

Cool and pour into a spray bottle. Refrigerate immediately. This should last about 2 weeks in the refrigerator. If you don't want to refrigerate you need to add 1% of a commercial preservative, or at the maximum recommended concentration for that preservative.

To use:
Shake well. Spray liberally on wet hair or dry hair, making sure all hair is covered. Scrunch or comb into hair with hands. When dry, scrunch out the crunchiness or smooth over hair with your hands as though you were gathering hair to make several ponytails.

©Science-y Hair Blog 2013
For dry or porous hair: This product may feel a bit drying for your hair - the acacia gum is to blame. I wouldn't use it every day and my hair is not usually dry. Use coconut oil or olive oil, at the higher amount given. If your hair reacts badly to this much aloe, switch to 1/3 cup water and 1 tablespoon aloe, or leave the aloe out completely and just use plain water or herbal tea (chamomile, nettle, rosemary, marsh mallow) instead.©Science-y Hair Blog 2013

Related Posts:

Mineral Sunscreen Smackdown

I have rather fair skin and blonde hair. My skin burns in the sun. And I've burned it plenty or times. But I hate sunscreen as much as sunburn. Maybe more. Not just the yucky feel on my skin, but also all the things there are in there to be allergic to. I'm going to give you my, "Very sensitive skin" impression of some of the sunscreens in my stash. I use mineral sunscreens to block out UVA and UVB rays and to avoid the rashes I get from "chemical" sunscreens. Having allergies really limits your choices, so if that's you, maybe my trials will help you.©Science-y Hair Blog 2013

Price: 
Under $10 = $
Under $10-20 = $$
Greater than $20 = $$$

*** I'll keep using it and buy it again when I'm out.
**   I'll use up the bottle, if I grow to love it, I may keep some around.
*    This is destined for the trash unless I can find somebody to give it to.


***Devita Solar Body Block, SPF 30. $$ This is the one that goes with us on the road. It rubs in like a very light lotion, it is clear.
Pros: Easy to use, no fragrance, no formaldehyde preservatives, no greasy feel.

Cons: Can be a little tingly/sting the eyes. Rubs off high-friction areas like the hands. If used often, can cause or worsen acne - it's the seaweed extracts! Not very water-resistant.


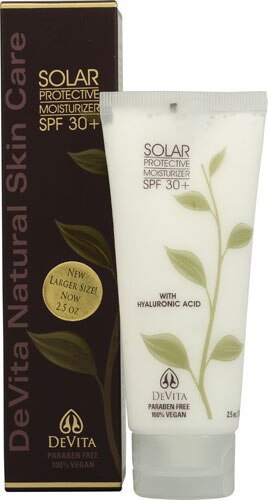
***Devita Solar Protective Moisturizer (right) is a little less stinging to the eyes (I don't mean when it runs into the eyes, I mean to have on the skin under them). It's even lighter-weight and nice on the face. Not perfect, but close.
For the face


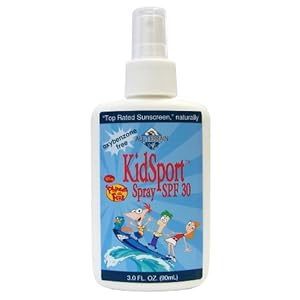
*All Terrain KidSport SPF30 Natural Sunscreen Spray- Phineas and Ferb (3- Ounce). $$

Pros: It's a spray, has no scent and SPF 30. No formaldehyde preservatives.

Cons: I burned right through this in about 2 hours. Feels slimy or oily on skin and a little tingly/burning.
I can't blame the product entirely, but it is difficult to apply enough spray to get a solid coating and then keep it in place. It has a very slippery skin-feel. The SPF may be 30 under testing conditions or hypothetically, but the reality was much different, and I have the very red arm and peeling neck to prove it. 


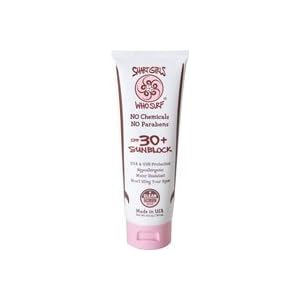
*Smart Girls Who Surf 30+ SPF Sunblock. $ to $$©Science-y Hair Blog 2013

Pros: Smells like orange blossoms (or "black locust" blossoms). Rubs in like a lotion, mostly clear. Seems to resist rinsing/sweating off. No formaldehyde preservatives.

Cons: Stings/burns. Like some mineral sunscreens, when you begin to sweat (even just tiny beads of sweat on your arms) it begins to feel very hot, heavy and occlusive. I couldn't get this one washed off fast enough. It was difficult to wash off - so that's also a "pro."


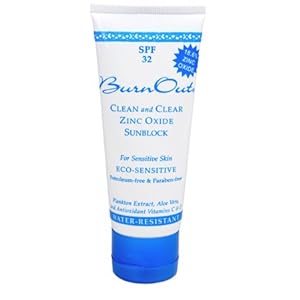
**BurnOut Eco-Sensitive Zinc Oxide Sunscreen SPF 32. $$


Pros: Easy to spread on the skin, very clear - like the name says - clean and clear. Resists rinsing off, no formaldehyde preservatives. Doesn't seem to sting - yet, anyhow. No fragrance.
Cons: Rather expensive for a smallish bottle. It is difficult to wash off (which is, of course, also a "pro").


***Colorescience Pro - Sunforgettable SPF 30 Mini Orb. $$


I've had this one for a while - it's tricky to use.
Pros: It really covers and stays in place - but is best for small areas like the face or hands. Resists rubbing and washing off. No formaldehyde preservatives, no fragrance.

Cons: It's a powder, so you need a cosmetic brush to apply (the little puff it comes with gets lost easily and doesn't work very well). It's likely to get into the eyes unless you're very careful. It must be applied to skin after a good lotion. This mineral powder will suck every molecule of water out of your epidermis, so you need a barrier of skin lotion, even if your skin isn't dry or chapped.

This stuff is great for the nose, the cheekbones and hands - places where sunscreen tends to rub off or that get a lot more sun than other parts of the body. It's fun to apply and comes in various tints to match your skin tone, including sparkly tints - though I didn't think husband would go for that. It's a bit hard to remove and though it has no fragrance, I can smell the "zinc oxide" smell unless I wash it off really well. Again, that is also a "pro" but for the sensitive noses.

Gave this one away.
A sunscreens that was just too awful to use again, even though it worked: California Baby ($$). No sting, great coverage and water resistance, but everything I touched, leaned against (cars, clothes) was permanently marked with a semi-greasy, white residue. Nasty.


You can still find me in my wide-brimmed hat and long sleeves/pants if I'm out very long. That's how much I hate sunscreen.

Related Posts: